
Zero2Automated - January 2023 Challenge
We've been seeing a flow of first stagers flying around on Twitter in the form of a OneNote document, so why don't we all have a look..
For this hunt, I will be sharing my analysis notes and thought processes on how I approached the Redline Stealer malware, what I learned from reverse engineering it and how it given me an idea of what I can build upon the things that I currently know. Here is some background on this malware family from Malpedia:
RedLine Stealer is a malware available on underground forums for sale apparently as standalone ($100/$150 depending on the version) or also on a subscription basis ($100/month). This malware harvests information from browsers such as saved credentials, autocomplete data, and credit card information. A system inventory is also taken when running on a target machine, to include details such as the username, location data, hardware configuration, and information regarding installed security software. More recent versions of RedLine added the ability to steal cryptocurrency. FTP and IM clients are also apparently targeted by this family, and this malware has the ability to upload and download files, execute commands, and periodically send back information about the infected computer.”
Malpedia
Recently, many content creators had been targeted by this particular malware campaign, abusing powerful and catastrophic yet publicly available tools (ahem, YouTube’s Copyright Claims system) to conduct cunning yet startlingly convincing attacks. I wanted to gain an understanding of the mechanics behind these attacks better through slightly lower level tools (as well as a great amount of improvising!) and techniques that can be used to handle crimeware.
To start with the hunt, here were the tools I used:
To evade sandboxes and antimalware, the original file contained an overlay, which caused it to be too big to analyse inside automated environments (reference).
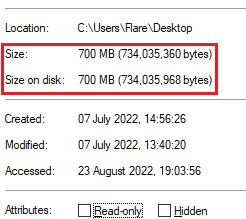 The sample totals to 700MB, which can evade set file size limits within sandboxes and antimalware solutions
Within Detect It Easy, the PE is shown to have its normal sections, as well as the bytes that prevent it from being analysed.
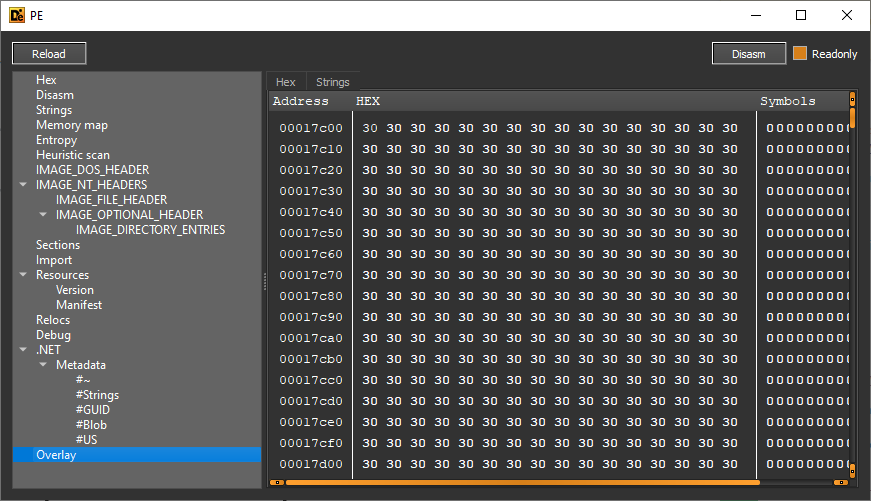 Rows of bytes consisting of 0x30 (0 in ASCII) lay dormant within the executable
The below script can be used to strip the overlay bytes from the executable to bring it back close to its original size.
import pefile
import sys
import os

data = []
filename = sys.argv[1]

print(f"[*] Original file size: {os.path.getsize(filename)}")
print("[*] Stripping overlay from file, standby...")

pe = pefile.PE(filename)
overlay = pe.get_overlay_data_start_offset()

strip_filename = filename + ".strip"

with open(filename, "rb") as fp:
    data = fp.read(overlay)
    with open(strip_filename, "wb") as fp:
        fp.write(data)


print(f"[*] Stripped file size: {os.path.getsize(strip_filename)}")
print(f"[*] New file is called {strip_filename}")
print("[+] Done!")
Alternatively, de4dot is capable of guessing the type of obfuscator used by the malware authors and removing the overlay, which I went with.
 de4dot identified a possible obfuscator used and cleaned the overlay bytes as well as light obfuscation
Searching through VirusTotal, there were no community comments at the time of investigation despite the sample having been uploaded there for a while. It was only known to be malicious by several AV engines.
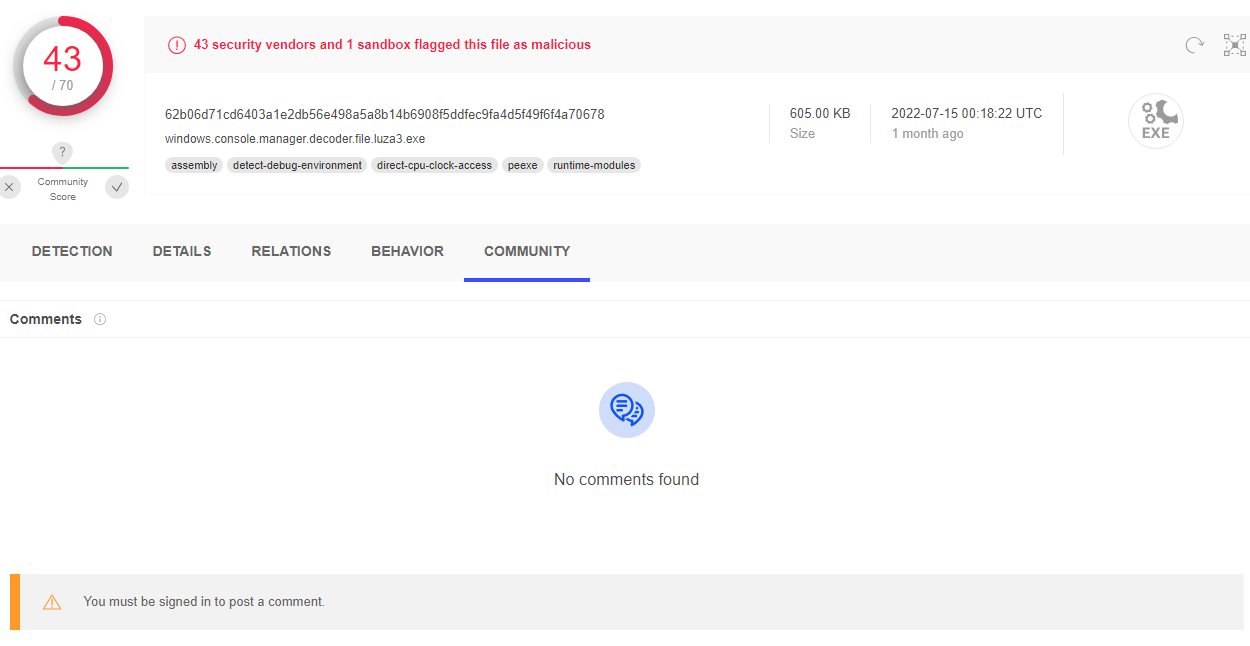 Vendor results from VirusTotal
Intezer however, was a different story. When running the sample inside its sandbox, it reported the following TTPs:
InstallUtil (https://docs.microsoft.com/en-us/dotnet/framework/tools/installutil-exe-installer-tool)65[.]21[.]74[.]139 (inactive at the time of the investigation) via a non-standard port)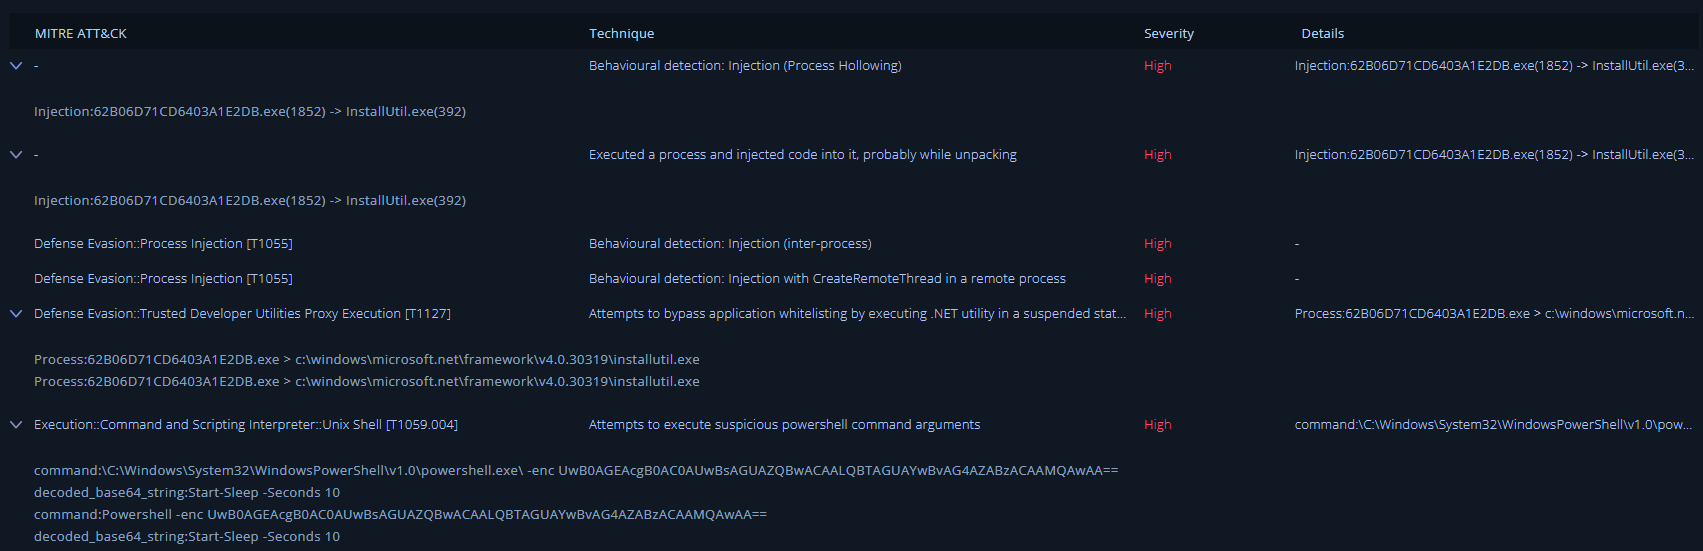 TTPs as well as their techniques, severity ratings and further details were identified in Intezer
As expected, all platforms also reported that the implant steals credentials. At this point, it was time to investigate within dnSpy.
After loading the sample into dnSpy, I found that its classes and objects had very deceptive names (surprise, surprise in crimeware). After attempting to run it, the sample halted its execution due to the presence of the debugger.
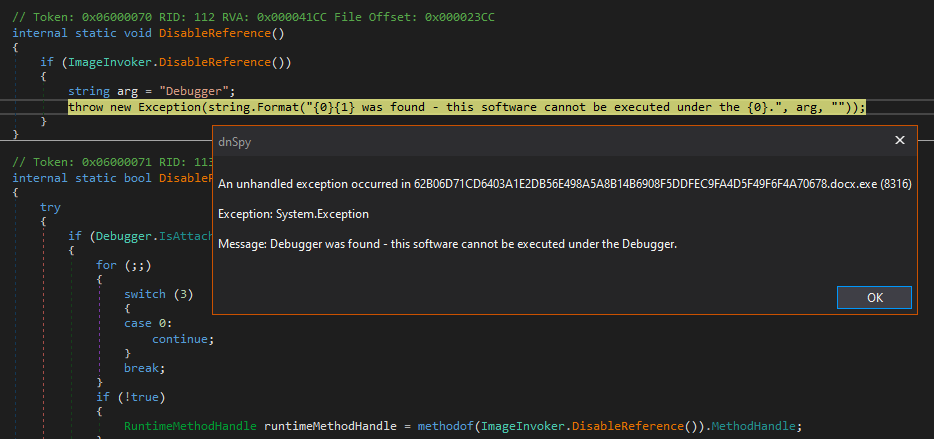 An anti-debugging technique was used to slow down dynamic analysis
This Redline sample detected dnSpy through dynamically imported functions, and to deal with this, I patched the IL assembly instruction for the line of if (ImageInvoker.DisableReference()) - the new logic of the expression was that if the sample detects the debugger, it runs. Reverse engineering psychology, right?
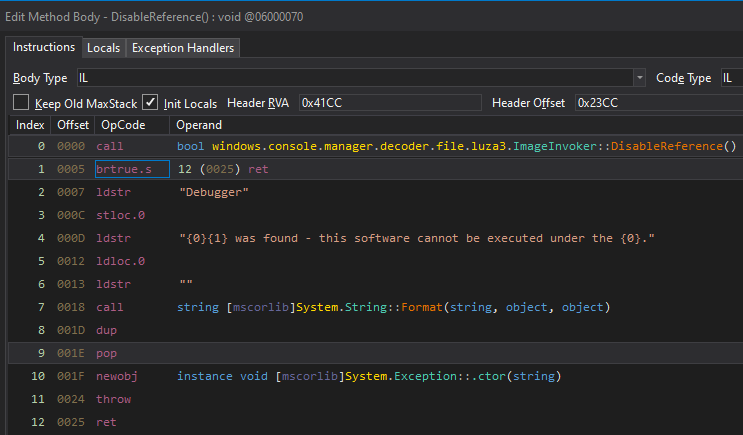 The original logic of the expression within the IL instructions was
 bfalse.s, before it got reversed to btrue.s through patching
After saving the module, the implant worked perfectly.
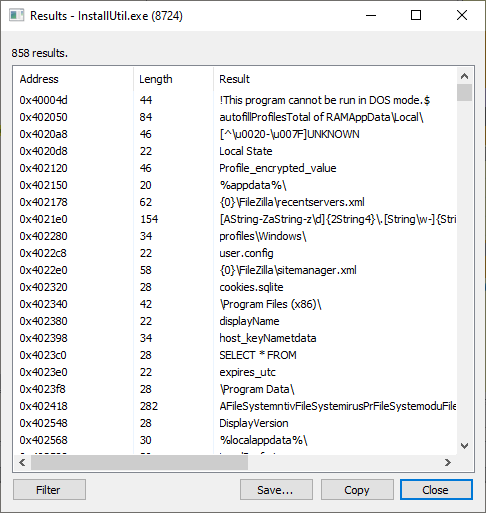
After scouting through the executable, I found an abnormally long series of bytes which even dnSpy couldn’t process them all.
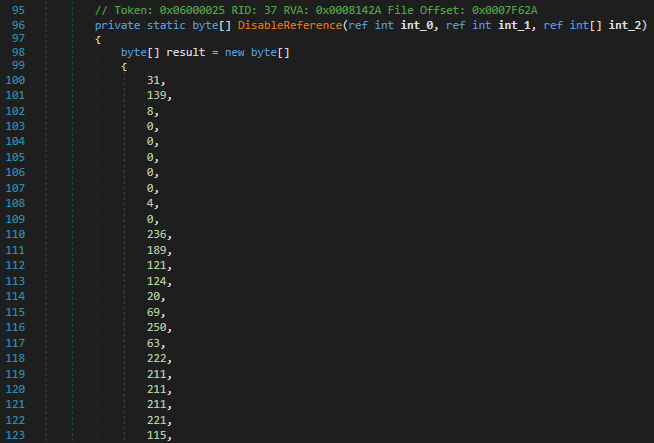 Noticing an array of bytes present within the C#
 …10000+ lines later
It was like staring down an elephant inside the room! I set a breakpoint at the caller so I can extract it from memory. It was 509KB in total.
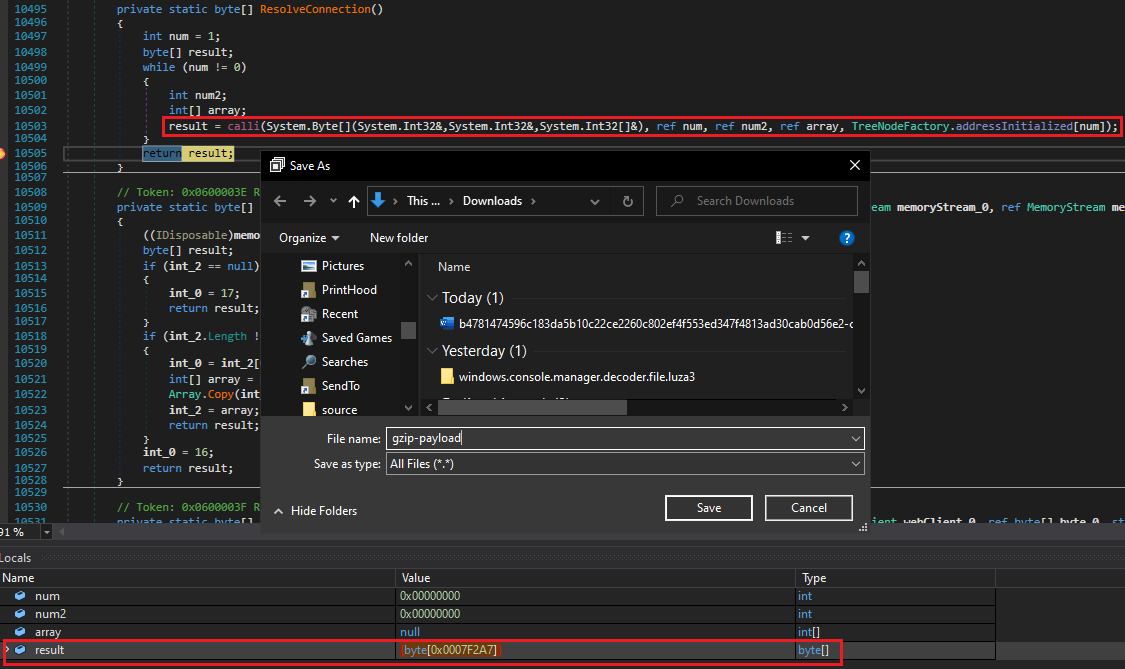 Chucking a Pokéball at the payload in memory
After decompressing the gzip data with CyberChef, the payload was found to be indeed a .NET-based PE. However, it was heavily obfuscated. de4dot was unable to detect which obfuscator was used on it as well.
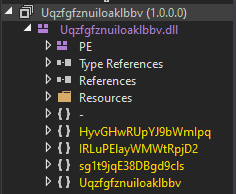 .NET assembly found in memory, containing obfuscated namespaces, classes and methods
 Definitely not a generated meme
I wanted to explore process hollowing as it happened at code level, but given that the code of the payload was heavily obfuscated, viewing the unmanaged calls through dnSpy proven difficult.
Some of my wild guesses were:
System.Reflection.Assembly.Load - the process hollowing may have been happening through the invoked .NET assembly, so it may bave been best to set a breakpoint at this function and extract .NET assemblies from there. The ImageDictionary class was likely responsible for this.I noticed that the sample killed its own process prior to starting InstallUtil. I set a breakpoint at various functions I believed the malware used (including Process.WaitForExit), and after a bit (hours, actually) of stepping through the code inside the debugger and observing the call stack, here was an example of what I seen:
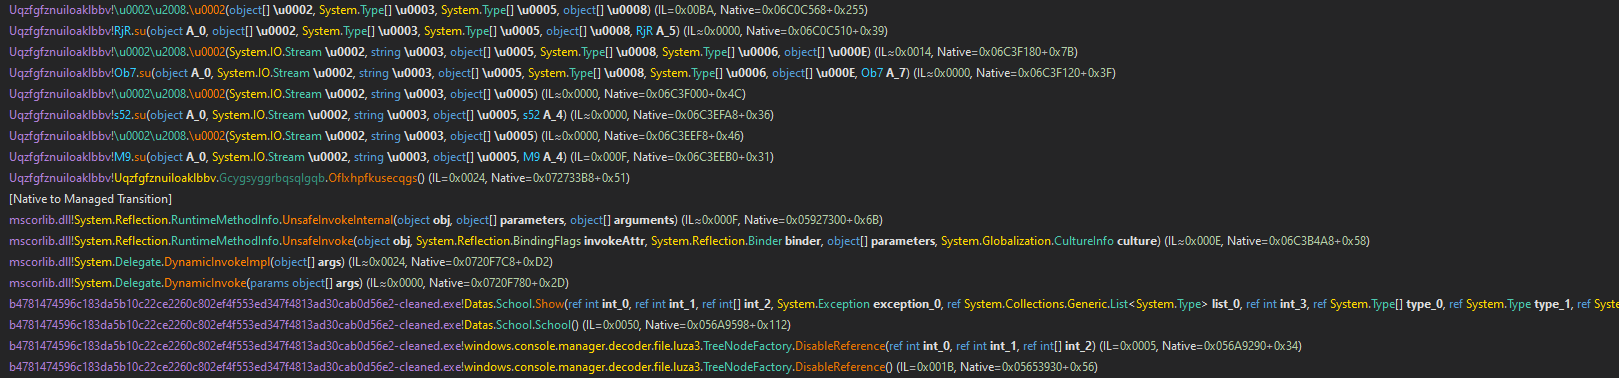 Call stack of the functions called before
 Process.WaitForExit
Quite the mess! Trying to analyse the obfuscated .NET assembly in dnSpy was a difficult task, so in the end I opted for continuing the dynamic analysis through x64dbg as the executable will eventually remove its own obfuscation once it is fully loaded in memory.
I’m aware that process hollowing uses the following APIs, which I set breakpoints for (as well as their counterparts) inside x64dbg, the ones in bold being prioritised due to them containing arguments related to what was seen in the TTPs: )
CreateProcessZwUnmapViewOfSectionVirtualAllocExWriteProcessMemorySetThreadContextResumeThreadThis is a classic pattern of process hollowing to make room for the malicious process, launching a legitimate Windows executable and using it as a sacrifical lamb to hide from security tools that lack the capability to detect and prevent malicious usage of these APIs. In the below sections. I was able to catch a few calls to a number of calls on some breakpoints.
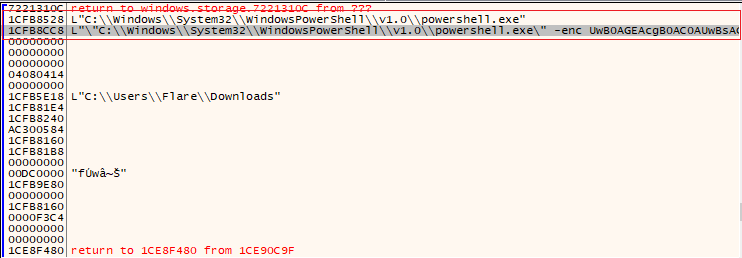
After a lot of trial and error, the first breakpoint that caught my eye was a call to CreateProcessW.
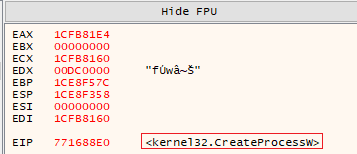 First call made to
 CreateProcessW
One of its arguments within the stack aimed to execute 64-bit PowerShell, along with a Base64-encoded command that causes the console to sleep for 10 seconds. Unimportant, but still one of the TTPs and a way to identify similar behaviour.
 As seen in the stack
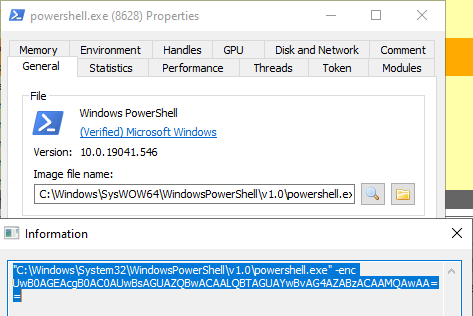
The full command line can be as seen in Process Hacker:
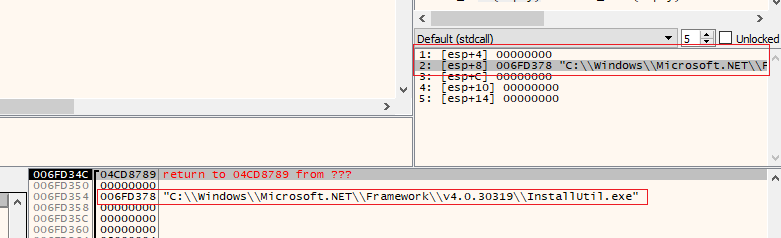
As expected, the malware eventually made a call to CreateProcessA that requested the Windows API to start a suspended process with the image of InstallUtil. ZwUnmapViewOfSection and VirtualAllocEx calls targeting InstallUtil followed not long after, removing all executable instructions of the original PE image and allocating space for the payload to be injected.
 First breakpoint at
 CreateProcessA
 Command line presented to the function
Below shows the strings of the original executable in memory before the injection and the parent-child relationship between the processes:
 Normal strings expected within the executable
 The sample presented itself as the parent process for
 InstallUtil - this can be helpful when hunting for IOCs through SIEMs
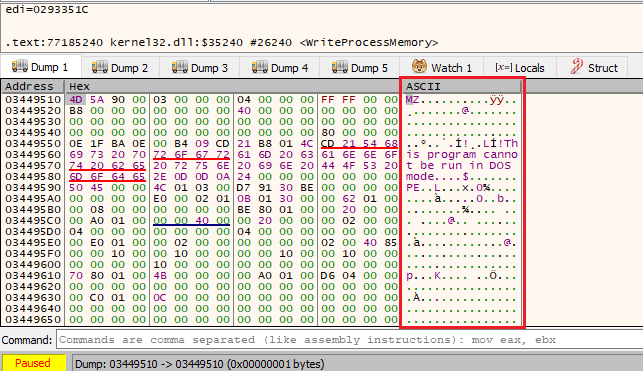
Finally, it was the Windows API call we had all been waiting for - WriteProcessMemory! Being able to catch a payload as it is being written to a target (whether it’s a file, process or network destination) is a crucial part of the analysis; in this case I am simply retrieving the evidence that a write operation is taking place. Below, the API in question as well as the PE header of the payload was spotted in x64dbg.

WriteProcessMemory as well as the parameters passed to it on the stack
Seeing the PE header in the stack gave the impression something cool was probably happening and worth watching! I allowed the program to run the function until it had returned a couple of times and completed its transfer of data.
 Spotting a partial chunk of the PE within the dump
Process Hacker also displayed corresponding results about the injection taking place within the new process.
 Query strings, file paths and more slightly obfuscated data relating to credential stores present in memory
The next calls to SetThreadContext and ResumeThread would then set the entry point to the new code section and take the process out of suspended state, hence proving the proxy execution of a trusted developer utility.
In other targeted campaigns, I would imagine malware authors would go through a lot more effort to hide strings in memory, especially from tools such as EDRs. Several of them were found in plaintext relating to software file paths, password databases and query strings which indicates successful code injection has taken place, and the final Redline payload is now running and attempting to steal personal information.
Seeing those strings, it was about time to dump the payload from memory.
 Aggressively tossing out the malware from memory
Given the process hollowing technique was used to inject the payload into InstallUtil, I used PE Sieve to extract the malware. PE Sieve is a powerful tool for detecting processes that were targeted in a potential code injection attack, dumping replaced or injected PEs, shellcode, hooks and other in-memory patches from memory and saving them into a file readily available for analysis.
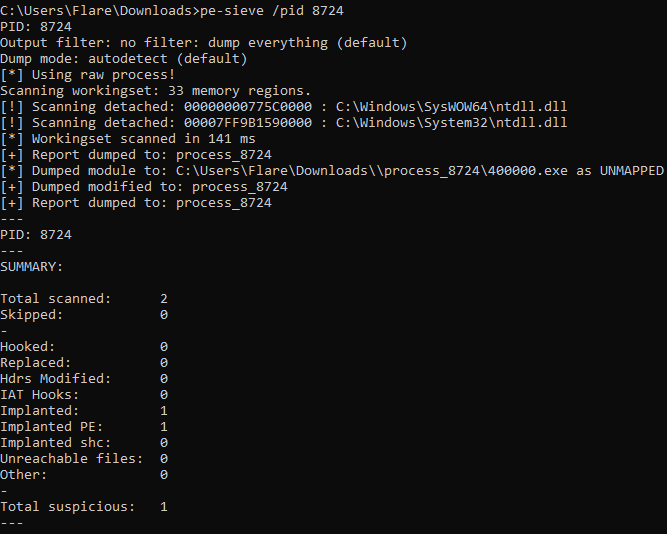 PE Sieve detected 1 occurrence of malicious code and dumped it into a new file
Of course, resulting threat intelligence tells that this executable is related to the Redline Stealer campaign due to code reuse.
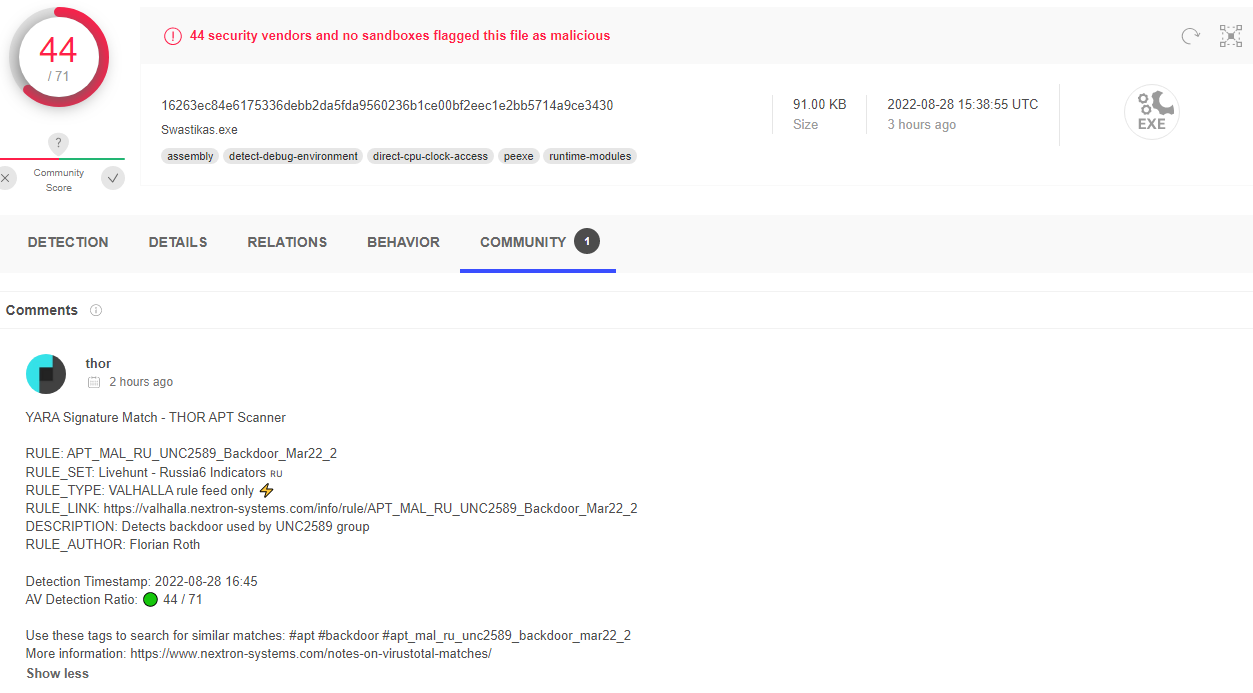 The payload as seen in VirusTotal, it was also recognised by the signatures within Florian Roth’s tool
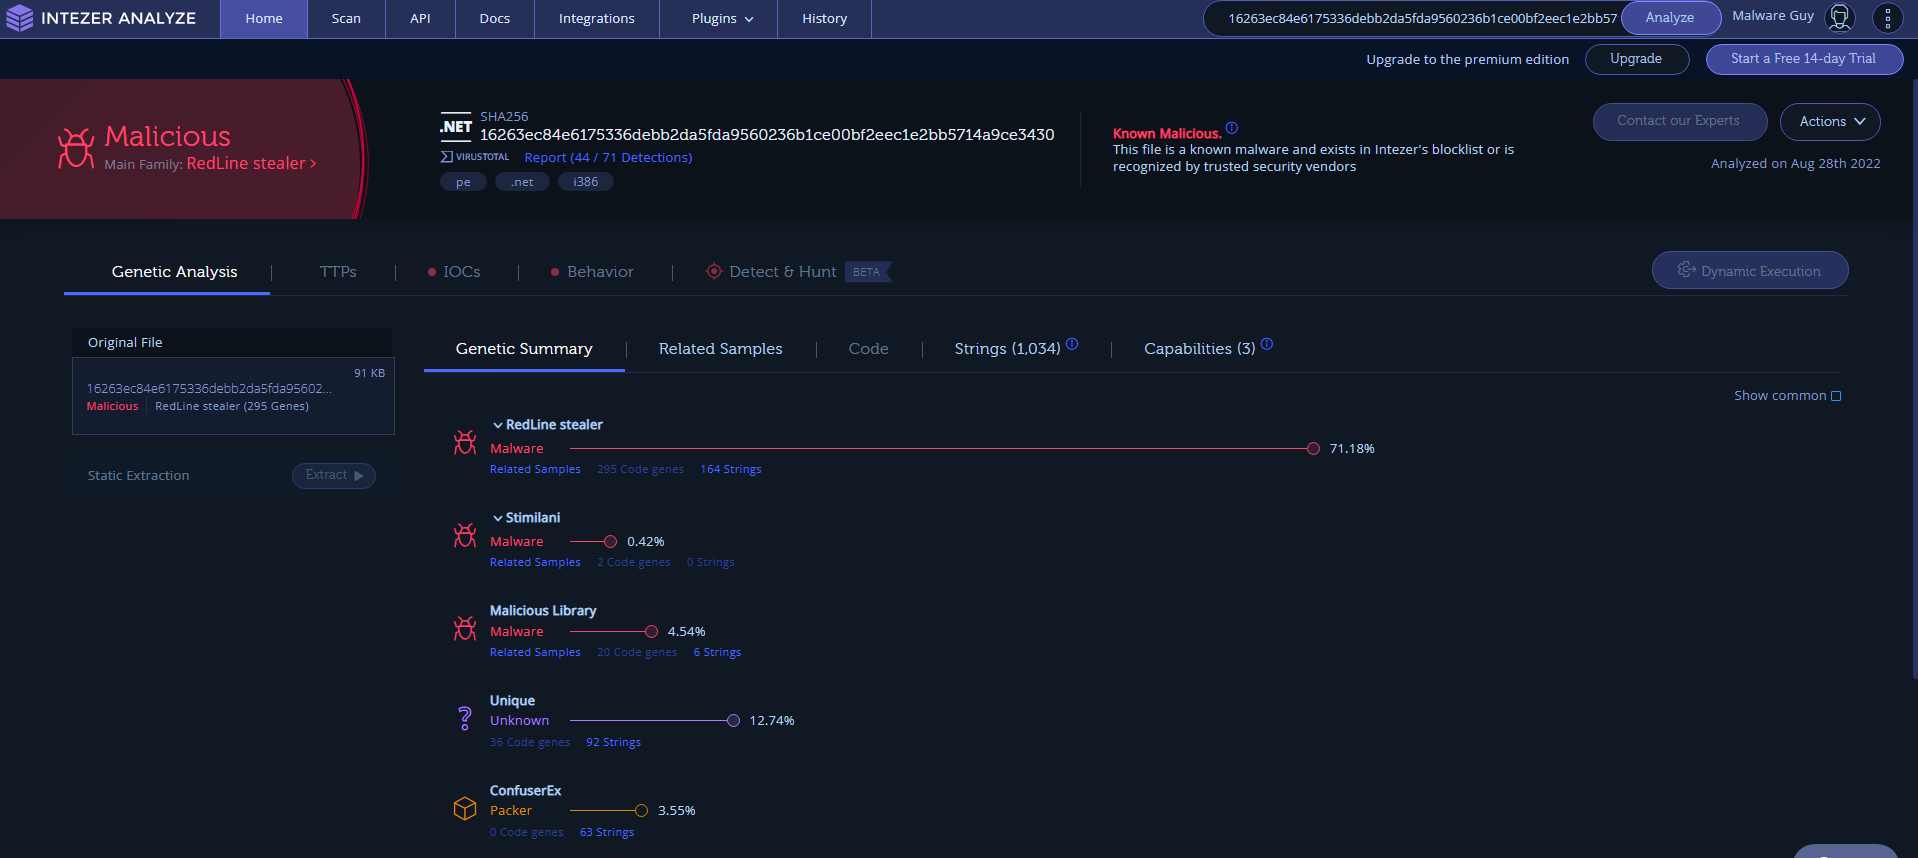 Threat intelligence as shown in Intezer
The payload itself was a portable executable, which could still be run alone. It was responsible for connecting to the command and control server as well as extracting and marshalling credentials and banking information to send back. Different command and control servers use a variety of protocols such as HTTP/S, DNS and IRC (ah, good old days!). Occasionally, threat actors write their own custom C2 protocols which do not adhere to the transmission rules of a well known service associated with their assigned port, and in turn can increase analysis time if it is not already known within threat intelligence, and circumvent firewall rules within organisations. In this case, the Redline sample attempted to connect back to 65[.]21[.]74[.]139 on port 20775, and for that it required the Win32 APIs.
MSDN described WSAConnect as one of the functions responsible for creating a network connection to IPv4 and IPv6 hosts. What I was most interested in was name - this parameter contained the address pointing to the variable that held the string of the C2 address within this malware.
 The target here was to identify the
 name parameter, which is a socketaddr struct that contained the IP address of the C2 server
After following the stack and sequentially the DWORD for the pointer within the name parameter, the IP address of the command and control server was located within the memory dump.
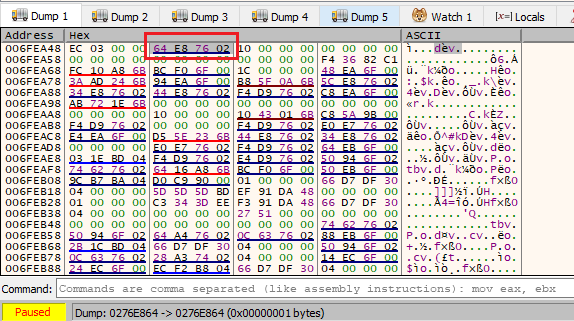 The sequence of bytes containing the address pointing to the parameter in question
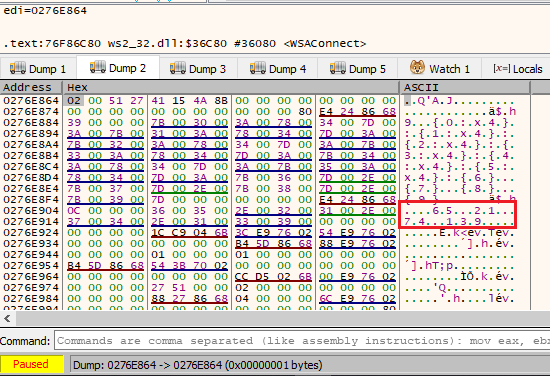 The IP address of the C2 as seen in the dump
Original SHA256:
b4781474596c183da5b10c22ce2260c802ef4f553ed347f4813ad30cab0d56e2
Stripped SHA256:
62B06D71CD6403A1E2DB56E498A5A8B14B6908F5DDFEC9FA4D5F49F6F4A70678
65[.]21[.]74[.]139
Process Creation: - "C:\\Windows\\System32\\WindowsPowerShell\v1.0\\powershell.exe" -enc UwB0AGEAcgB0AC0AUwBsAGUAZQBwACAALQBTAGUAYwBvAG4AZABzACAAMQAwAA==
Process Creation - C:\\Windows\\Microsoft.NET\\Framework\\v4.0.30319\\InstallUtil.exe
Injected payload SHA256:
16263ec84e6175336debb2da5fda9560236b1ce00bf2eec1e2bb5714a9ce3430
https://malpedia.caad.fkie.fraunhofer.de/details/win.redline_stealer https://tria.ge/220705-zwf3dsdaaq https://www.virustotal.com/gui/file/62b06d71cd6403a1e2db56e498a5a8b14b6908f5ddfec9fa4d5f49f6f4a70678 https://analyze.intezer.com/analyses/6146f62d-9f78-4e38-b944-b62daa82ade7/ https://www.virustotal.com/gui/file/16263ec84e6175336debb2da5fda9560236b1ce00bf2eec1e2bb5714a9ce3430 https://analyze.intezer.com/analyses/a3ba1334-11b9-4534-934d-f17f6c501c69
While nearly finishing the unpacked variant, I decided to have a brief look at the one John Hammond mentioned in his Twitter status too. As I am still learning the ropes of unpacking malware in different circumstances, I want to re-visit this on a future occasion!
Pretty much the same principles applied to getting rid of the overlay. It went down from 471MB to a mere 600KB.
Original SHA256: f8df7a34f17242157f9095b4aa05740c7ea9769bacd766cb1b0eac817a52455b
Stripped SHA256: 514eef525b97f3e00ff6f4bc60955c0fe0a5ff74d5996b448e80e6eef699c5ed
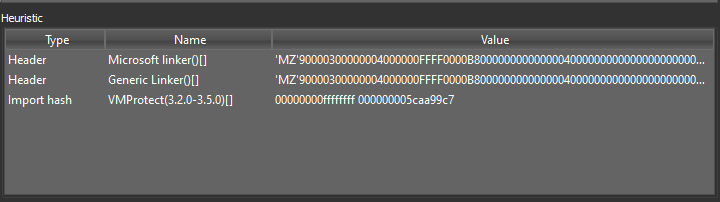 Detect It Easy indicates the sample was packed with VMProtect 3.2-3.5 through its import hashes
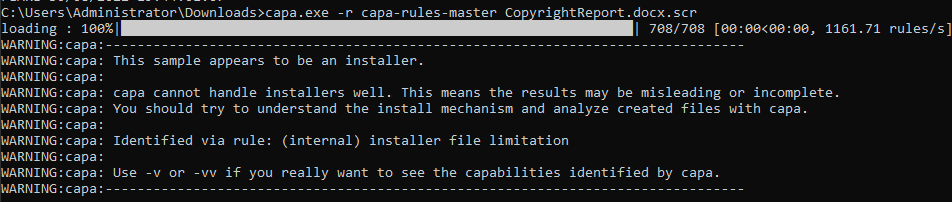 CAPA 4 particularly didn’t enjoy being fed this sample (who would with any malware really?), probably most likely due to VMProtect 3
Because there is a lot of threat intelligence and analysis on Redline, many of its behaviours had been already documented and there would be a great number of assumptions to make when re-exploring this variant:
ReadFile and RegOpenKey will be most likely used)WSAConnect and WSASocketW.These functionalities would be enough to consider setting breakpoints at and exploring when I unpack this variant.
Another assumption to make is that some or many of its functions would need to be devirtualised due to it being packed by VMProtect, and if I wanted to make the executable runnable again I would need to fix the original entry point and the import address table. In the real world, there would be a high chance I would use automated tools such as UnpacMe to extract the payload, but it would be great to have some practise unpacking manually as well.
https://tria.ge/220829-ray23sbdh9 https://www.virustotal.com/gui/file/514eef525b97f3e00ff6f4bc60955c0fe0a5ff74d5996b448e80e6eef699c5ed https://analyze.intezer.com/analyses/cd7437cf-35f9-4804-93bf-186362abd9b1 https://www.joesandbox.com/analysis/695059/0/html
Investigating this sample had unearthed some skills that laid dormant in my arsenal for a very long time, and it allowed me to experiment with things that worked and did not work. I had a lot of fun working on this, going some of the extra miles with what I currently know in this hunt may not have been practical in the real world (malware reports are more focused on exposing immediate effects of malware rather than verbose steps on how to expose them) but they can come in handy on future occasions. There were a few things that I learned:
Hopefully this post was easy and comprehensive for other beginners who are also keen on getting into malware analysis. I’m looking forward to taking on more challenges!
Thank you for reading, if you want to talk about this post or have any questions feel free to reach out to me on any of my social media handles.
This exercise was made possible thanks to HuskyHacks, check his social media out!
Also check out billycontra, this awesome individual proofread my endeavors and provided some helpful advice before it went live!
We've been seeing a flow of first stagers flying around on Twitter in the form of a OneNote document, so why don't we all have a look..
This RE shitpost was not sponsored by the OALabs, however if you don't have it already go...

